
The most amazing crochet jacket you're going to have to make. (Or get someone to make for you.)
A few years ago I saw a picture of an incredible, multi-coloured crocheted jacket that someone shared on Facebook. I immediately knew that I must have a version of it. But I had a problem: I can't crochet. (Also, I am unwilling to learn because I am not good at things that require too much counting or concentrating. All my current counting and concentrating skills are being consumed by my cello.)
So, I took the cheat's way out.
I asked Facebook for it.
"Don't suppose anyone wants to make me this?" I posted, wheedlingly hopeful, along with the photo I'd found.
Amazingly, a crocheting friend of mine said yes. "I don't have a project at the moment," she said. "If you get the wool and figure out how it goes together, I'll make it for you."
Thank you, Facebook, and thank you, thank you, thank you, Judi. I did some measurements, made some sketches and bought some wool. Two months later, I was wearing this:

Amazing, right?
It's been in my cupboard for a while but I pulled it out again for a 70s theme Christmas Carols night. So many people commented on the photo of it that I thought I really should put up the instructions to make it.
Crochet jacket instructions
First, please note that this is NOT a pattern. I'd call it a helpful guide to figuring it out for yourself. If you know how to crochet, that's great. (If not, there are copious instructions on the net.) If you have a reasonable grasp on how to put things together, that's even better. Also, I have only measured this particular jacket, in this particular size (approximately a womens size 14). You'll have to adjust measurements to suit your own size.


The jacket is made up of a back, two sleeves, two side panels and a crocheted band that goes from front bottom corner all the way around, to the other front bottom corner.
Sleeve
The sleeve is made up of a big crocheted square made up of 16 different coloured rows. 17 more rows are added to one side of the square for the length to the wrist.
The entire sleeve piece is 47cm long. The width at the top of the sleeve, where it joins to the jacket is 36cm, but somehow it reduces to 26cm at the wrist.(Crocheters should know how to do that, right?)
Back
The top of the back panel is made up of one big square, measuring 32cm on each side, and using 17 rows of colour. Attached to that are four rows of four small squares, measuring about 8cm on each side, and using 4 different coloured rows. After you've attached the small squares to the large squares, crochet 9 coloured rows on the bottom of the jacket. The back measures 85cm from the shoulder to the edge.


Side/Front Panels
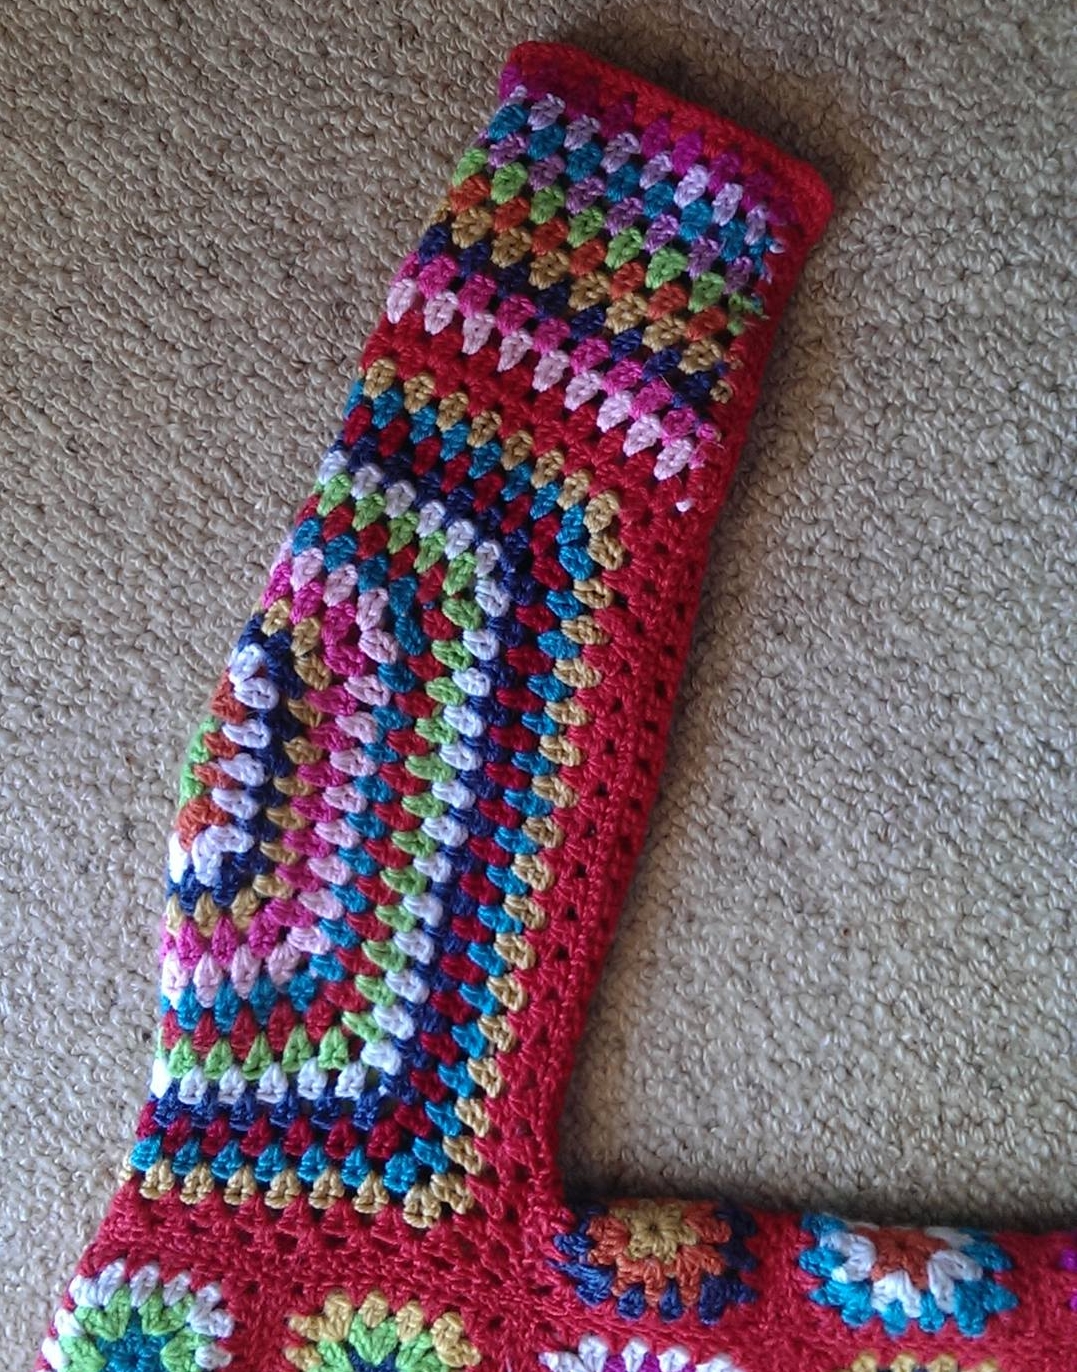
The side panels are made up of two strips of small squares. Again, the squares are 8cm on each side. One strip uses 6 squares. See it there, in the left photo, on the back, going halfway up the large square, to join the bottom of the sleeve?
In the picture below, on the right, you can see, joined to the 6-square strip, and going around the front of the jacket, a long strip of 8 squares. This one makes the shoulder seam, joining the top of the large square on the back. (There are some extra stitches in there, folks. I can't figure that one out. You'll have to do your best.)


Collar strip
Once you have the back and front joined down the side, and across the shoulder, it's time to begin to crochet the long segment that makes up the collar and major part of the front. Begin at the bottom of the jacket, and keep going right around to the other side. Crochet 17 rows, plus two rows right around the whole jacket, of the main colour. Join the sleeve to the jacket, and crochet a binding row around the wrist.
I chose a main colour (red) and at least 10 other colours. The wonderful woman who put it together was clever enough to not repeat any colour combinations in the small squares.
How much wool will you need? Honestly? I don't know. You'll have to figure that out for yourself too.
A final word of caution
This is NOT my design. Yes, it's true, I callously ripped off a photograph on the internet, however, it wasn't for a lack of searching for the pattern, or any form of instructions. I seriously looked hard for several days. (Also, if you're the person who made the original, you're amazing. And you really should publish a pattern and sell it because I think you'll make a motza. I'm giving these instructions away for free, but I'd whip them off my blog before you can say the words 'crocheted jacket' if you gave me a link to a pattern instead, and I'd promote your pattern all over the place.)
To everyone else, my instructions are entirely made by me, but you follow them at your own risk. I don't guarantee anything, except that if you succeed, you will probably be as happy as I am with mine. Also, you will have a constant source of conversation, every time you wear it.
And I'd love to see your finished photographs!